Have you ever arrived at a community event with your mobile medical unit awning and realized your staff had no shade, patients had no cover in the rain, and no one had a clear idea how to safely set it up? In parts of the U.S. like Arizona, Texas, and Florida, heat exposure can quickly turn an outdoor mobile clinic into an exhausting experience for both patients and care teams.
According to the CDC, extreme heat causes hundreds of deaths every year in the United States. That’s a serious concern when you’re running a mobile health clinic outdoors. A properly used awning helps create a safer, calmer space for mobile medical care, vaccine clinics, pediatric visits, and outreach events while protecting people from sun, wind, and light rain.
At AVAN Mobility, we’ve spent more than a decade building mobile medical units designed to remove barriers to healthcare and save lives. We’ve manufactured more than 180 mobile medical vehicles and worked with organizations like CalOptima and Pacific Clinics across the country. Our Ford Pro Upfitter and Stellantis QPro certifications reflect the standards we build to every day. At the same time, we know there are other manufacturers out there, so this guide focuses on helping you make informed decisions for your organization.
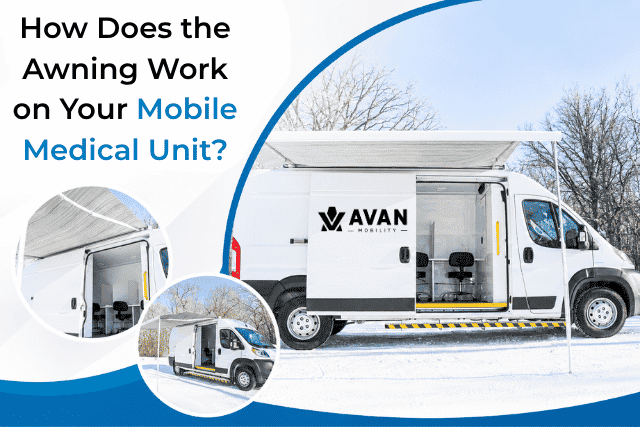
In this article, you’ll learn all about how to set up the awning on your mobile medical unit.
What steps are involved in operating your mobile medical unit awning?
Using your mobile medical unit awning gets much easier once you understand the order of operations. That’s important because rushing the setup can put strain on the awning, the roof of your Mobile Clinic Van, or even your staff. The manufacturer’s instructions focus heavily on safety and proper support placement for a reason.
If you picture a mobile vaccine clinic arriving at an outdoor event in Phoenix or a mobile pediatric clinic parked at a school health day in Oklahoma, the awning quickly becomes part of the patient experience. A calm, shaded area helps people feel more comfortable before they even step inside your mobile health unit.
Step 1: Start opening the awning slowly and support it early
The first step is extending the awning using the supplied crank handle. You should begin opening the awning gradually instead of pulling it fully out all at once.
Once the mobile medical unit awning reaches about 1 meter, or just over 3 feet out from the vehicle, stop and lower the support legs. This step helps avoid extra strain on the roof of your mobile medical van.
Here’s the basic process:
- Open: Extend the awning slowly with the crank handle.
- Pause: Stop once the awning reaches about 1 meter out.
- Grab: Hold the support leg near the hinge joint.
- Pull: Bring the leg toward you carefully.
- Lower: Unhook the leg and lower it down.
- Adjust: Set the support leg to your preferred height after the awning is fully extended.
The diagrams in the manual also show that the legs should come down smoothly from the front lead bar instead of being forced outward.
One detail many mobile healthcare teams overlook is leg positioning during closing. The foot of each support leg has to sit correctly inside the lead bar housing when you close the awning. If it’s placed incorrectly, the awning may not close fully. The manual specifically says the base should face toward the lead bar during storage.
After the legs are down and adjusted, the next step is stabilizing the awning so your mobile outreach clinic stays protected during everyday outdoor use.
Step 2: Stabilize your awning after opening it
Once your awning is fully extended, the next step is making it stable and safe for daily mobile medical services. This part is easy to overlook when your team is busy setting up a mobile clinic, checking patients in, or preparing equipment inside the mobile health van. Still, proper stabilization helps protect your mobile medical unit’s awning from sudden movement caused by wind or uneven tension.
After fully opening the awning in step one, adjust the support legs to the desired height. The diagrams show the legs extending vertically and locking into position to support the front lead bar evenly.
At this stage, the manual recommends securing the legs to the ground using the included hooks or stakes. This helps stop the awning from lifting during an unexpected gust of wind.
Here’s the process:
- Extend: Fully open the mobile medical unit awning.
- Set: Adjust both support legs to your chosen height.
- Secure: Anchor the legs into the ground using the provided hooks.
- Add: Use the optional Tie-Down system for added stability.
It’s strongly recommended to use the optional tie-down accessory for extra safety support. This helps support the leg base to help reduce movement during outdoor use.
This step can make a big difference during real-world mobile clinic operations. Imagine a mobile medical clinic parked outside a county fair in Kansas or a mobile outreach clinic running health screenings in coastal Florida. A quick afternoon wind gust can arrive with very little warning. Anchoring the awning properly helps your care team stay focused on patients instead of scrambling outside to steady equipment.
Note that the awning is designed mainly for sun protection. That’s important to know once you start dealing with rain, changing weather, and water runoff, which is the next step in safely using your mobile medical unit awning.
Step 3: Lower one side of the awning to help with water drainage
Once your mobile medical unit awning is stable, the next step is learning how to handle changing weather conditions. That’s a big deal for mobile clinics operating across the U.S., especially in places where the weather changes quickly. A calm sunny morning in Tennessee can turn into heavy rain by lunchtime, and strong wind gusts in states like Colorado or Texas can arrive fast.
If the weather changes suddenly and you can’t close the awning right away, ensure that one side of the awning is lowered slightly so water can flow off instead of pooling on top. It’s also recommended to install the tension rafter support bar for additional fabric support during rainy and windy conditions.
Here’s what’s involved in that:
- Close: Shut the awning during strong wind, rain, or snow whenever possible.
- Lower: Drop one support leg slightly lower than the other if the awning must stay open temporarily.
- Drain: Allow water to run off the lower side instead of collecting on top.
- Install: Use the tension rafter support bar for extra fabric support.
This step helps protect both the awning and the experience around your mobile health clinic. Think about a mobile vaccine clinic during a community event in Louisiana. Heavy rain pooling overhead can quickly create stress for staff and patients waiting nearby. Allowing water to drain properly keeps the area safer and helps reduce strain on the awning structure.
Step 4: Lower the front panel carefully if you need better access

Sometimes the front of your awning may sit higher than expected after setup. That can make the support legs harder to reach, especially during a busy mobile clinic day when your team is moving quickly between patients, supplies, and outdoor check-in areas. The awning on your mobile medical unit comes with a pre-set angle, though it can be adjusted slightly when needed.
This part of the setup should always be handled carefully because the awning arms stay under tension while extended.
If the front lead bar sits too high, you can lower the front section slightly by removing the washer shown in the awning diagrams.
Before making this adjustment, fully extend the awning first. The support arms are under tension during operation, so slow and careful movements are important during this step.
Here’s the adjustment process:
- Extend: Open the awning completely before making adjustments.
- Locate: Find the washer shown near the arm connection point.
- Remove: Take out the washer carefully to lower the front panel slightly.
- Store: Keep the washer in a safe place for future use.
- Avoid: Do not adjust the lower screw marked “A”.
The diagrams also show that the washer adjustment should only be performed on the designated connection point. The lower screw underneath should never be touched during setup or adjustment.
This adjustment can help teams operating a mobile healthcare vehicle in tighter spaces or uneven parking areas. For example, a mobile outreach clinic parked on a sloped lot outside a rural community center may need a slightly lower front edge to make setup more comfortable for staff.
Once the awning angle feels right, the next step is learning how some setups allow the support legs to attach directly to the vehicle itself for added stability and cleaner ground space.
Step 5: Consider securing the support legs to the vehicle
Some mobile medical units operate in spaces where ground stakes are not practical. You might park your Mobile Clinic Van on concrete outside a hospital, at a downtown health event, or beside a school parking lot during a mobile vaccine clinic. In those situations, attaching the support legs directly to the vehicle can help keep the setup cleaner and more organized.
Here’s how the process works:
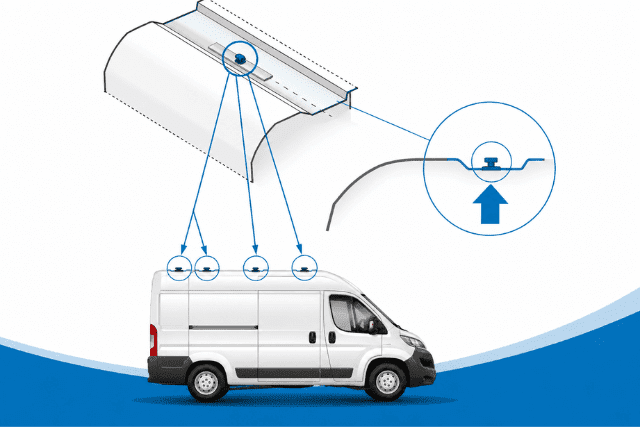
- Install: Mount wall brackets onto reinforced areas of the vehicle.
- Position: Align the support legs with the mounted wall brackets.
- Attach: Secure the legs into the bracket connection points.
- Check: Confirm the legs are seated properly before use.
One important detail here is placement. The brackets should only be attached to reinforced points on the vehicle body. That helps support the load placed on the mobile medical unit awning during operation.
This option can help mobile healthcare teams keep pathways clearer around the vehicle. Imagine a mobile pediatric clinic parked outside a busy community center in Chicago. Keeping the support legs attached closer to the vehicle may reduce tripping hazards around patient waiting areas and improve foot traffic flow near the mobile health unit.
After setup is complete, the final step is making sure the awning closes correctly before driving away to your next mobile medical services location.
Step 6: Store the awning correctly and check it before leaving
At the end of a long mobile clinic day, it’s tempting to pack up quickly and head to the next stop. Still, closing your mobile medical unit awning properly is one of the most important parts of the entire process. A support leg stored incorrectly or an awning left partially open can create problems once your mobile health vehicle is back on the road.
That’s why the final setup step focuses on careful closing, storage, and quick visual checks before driving away.
When closing the awning, the support leg feet must sit properly inside the lead bar housing. The base of each foot should face toward the lead bar during storage. If the foot sits incorrectly, the lead bar may not close completely.
Here’s the full closing process:
- Lower: Bring the support legs down carefully.
- Position: Place the leg feet correctly inside the lead bar housing.
- Close: Retract the awning slowly using the crank handle.
- Check: Confirm the lead bar closes fully and evenly.
- Inspect: Verify the awning is completely shut before driving away.
The care instructions also recommend storing the awning dry and clean whenever possible. Moisture left inside the fabric can create stains over time. If you must close the awning while wet, reopen it within 12 hours to let it dry.
For many organizations, the awning becomes part of the rhythm of delivering mobile healthcare. One day, your mobile medical clinic may be serving patients at a rural health event in Montana. The next day, your mobile outreach clinic could be parked outside an urban shelter program in California. Proper setup and storage help your mobile medical unit stay ready for every stop along the way.
Got any questions about using your mobile medical unit awning?
You came to this article because using a mobile medical unit awning can feel intimidating at first. When your team is focused on patient care, outreach events, and keeping people comfortable outdoors, the last thing you want is confusion during setup or concerns about safety.
After reading this article, you now understand:
- How: To open and support your awning correctly.
- When: To stabilize and anchor the awning.
- Why: Weather conditions change how the awning should be used.
- What: To check before closing and driving away.
Our team at AVAN Mobility has spent over a decade helping organizations across the U.S. bring healthcare directly into communities through mobile clinics, mobile outreach vans, and mobile counseling vehicles designed around real-world challenges. Our team works closely with healthcare providers, behavioral health organizations, counties, tribal organizations, and nonprofits to build mobile healthcare solutions that feel practical, approachable, and ready for everyday use.
That hands-on experience has taught us something important. Small operational details, like understanding your mobile medical unit awning, can make a big difference in how confident your staff feels in the field. If you have questions about mobile medical units, mobile health clinics, or choosing the right setup for your organization, click the button below to talk to a mobility expert.
If you’re not ready to speak with a mobility expert yet, here are a few next reads that can help you move further along your research journey.
Recommended next reads
- Mobile medical van customization: What is it all about? Learn how organizations customize mobile medical units for workflows like behavioral health, primary care, vaccinations, and outreach programs.
- What 6 factors should you consider when customizing a mobile medical clinic? This guide walks you through key customization decisions.
- How to run a mobile clinic on an external power source: If you’re planning outdoor events or remote deployments, this article explains how mobile clinics can safely operate with external power setups.